
How Can We Help?
Search for answers or browse our knowledge base.
Contents
< All Topics
Print
How To Video Shorts: The Vantiq Version Control System
Posted
Updated
ByLisa Ackerman
0 out of 5 stars
| 5 Stars | 0% | |
| 4 Stars | 0% | |
| 3 Stars | 0% | |
| 2 Stars | 0% | |
| 1 Stars | 0% |
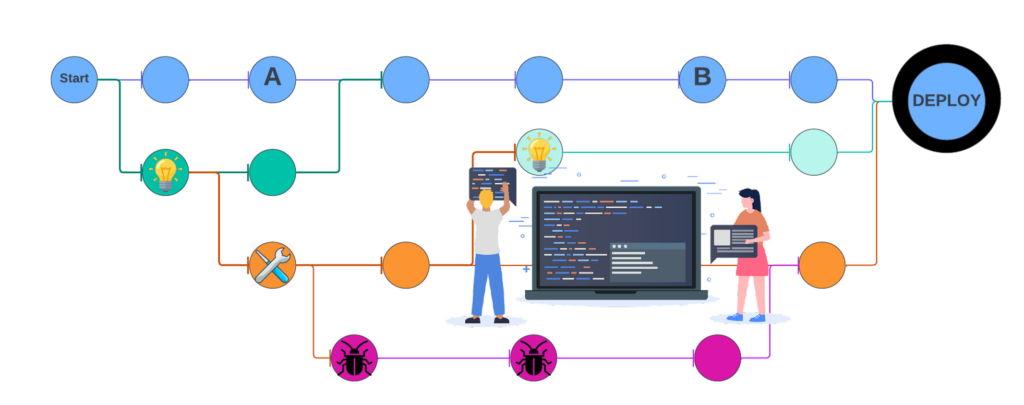
Keep track of your progress and merge multiple projects with the Vantiq VCS!

How the VCS Works
The Version Control System downloads your project files to the local file system so progress can be tracked using your favorite versioning software.
The VCS can also upload files into your project when:
- You want to back out of a project change
- You want to merge in work from another developer

Steps to Versioning the Project:
1. Start a VCSSERVER from a terminal window (use Vantiq CLI)
2. Create a directory to hold project files
3. Initialize versioning in the project directory
4. In the IDE, record the pathway to the project file directory
5. In the IDE, sync the project files to the directory
6. In the terminal window, add the files and commit changes
7. Repeat Steps 5 & 6 through the development process

Steps to Restoring or Merging the Project:
1. Projects –> Combine Project From VCS
2. Input desired filesystem directory & project name
3. Create a View for seeing changes, and click OK
2. Input desired filesystem directory & project name
3. Create a View for seeing changes, and click OK
Caution: Any resources of the same name and type will be overridden by incoming material!

Use the VCS to Keep Projects on Track
Vantiq’s Version Control System can be used with any local filesystem architecture, and with whatever versioning software you prefer. Sync and commit often to keep track of progress, back up projects, revert to previous versions, and combine the work of multiple developers seamlessly.
For more information, refer to the CLI Reference Guide (for starting the VCSSERVER) and the IDE User’s Guide for more about the VCS tool.
Was this article helpful?
0 out of 5 stars
| 5 Stars | 0% | |
| 4 Stars | 0% | |
| 3 Stars | 0% | |
| 2 Stars | 0% | |
| 1 Stars | 0% |
5
-
Getting Started
-
- Advanced Collaborations
- Analytics
- App Components
- Assemblies
- Catalogs
- Client Builder
- Client Components
- Conversation
- Debugging
- Deployment
- Floor Plan
- GenAI Builder Tutorial
- Introduction to Collaboration
- Introductory Tutorial
- Open Inference
- Quickstart Tutorial
- Sources
- Stateful Services
- System Modeler
- Testing the Debugging Tutorial
- Testing the Introductory Tutorial
- Testing the Source Tutorial
- User and Namespace Administration
- Show Remaining Articles ( 8 ) Collapse Articles
-
-
Product Documentation
-
-
- AMQP Reference Guide
- CHATBOT Reference Guide
- Email Reference Guide
- Enterprise Connectors Reference Guide
- External Sources Reference Guide
- Google Cloud Pub/Sub Reference Guide
- KAFKA Reference Guide
- MQTT Reference Guide
- Push Notification Reference Guide
- Remote Reference Guide
- SMS Reference Guide
- Video Reference Guide
-
-
Articles
-
- Build Your Own Tools
- Cache Services
- Camel Assemblies
- Client to Component Conversaion
- Discovering Current Session Information
- Dynamic Client Content
- Dynamic Map View Widget
- Filters
- Generative AI Functions (Tools)
- Generative AI with Collaborations
- How-To Video Shorts: Managing AI Conversations
- How-To Videos: AI Design Model Assistant
- How-To Videos: AI Documentation Search
- Managing AI Conversation
- Production Applications Best Practices
- Public Clients
- Security Secrets
- Service Event Handlers
- Sharing Resources
- Streaming AI Output
- Transformations
- Using the Video Sources
- Web-Based APIs
- Show Remaining Articles ( 8 ) Collapse Articles
-
- How To Video - The Join Activity Pattern
- How To Video Shorts - LLM Playground
- How To Video Shorts: Client Layouts
- How To Video Shorts: AI Tools (Functions)
- How To Video Shorts: Analytics and ComputeStatistics
- How To Video Shorts: Calling Procedures by Properties
- How To Video Shorts: Client CSS
- How To Video Shorts: How to Create a Built-In Source
- How To Video Shorts: Invite Other Users to Your Namespace
- How To Video Shorts: Multi-Modal Example
- How To Video Shorts: SplitByGroup
- How To Video Shorts: The Vantiq API
- How To Video Shorts: The Vantiq IDE
- How To Video Shorts: The Vantiq Version Control System
- How To Video Shorts: Using Generative AI in Applications
- How To Videos - Maintaining AI Conversations in Collaborations
- How To Videos: Secrets
- Show Remaining Articles ( 2 ) Collapse Articles